Kijelző, átalakító, mikroproc...
»
Fejlesztő modulok, Arduino, Raspberry
»
Pajzsok - Shield - Arduino - Raspberry Pi
»
An introduction to ISD1700 voice module
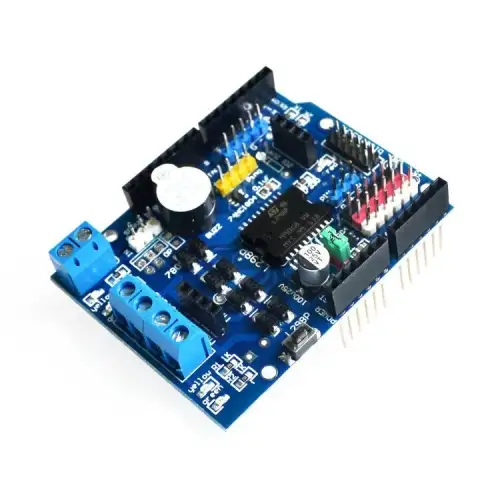
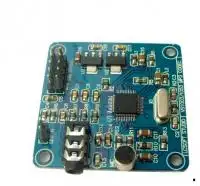
The ISD1700 voice module is a simple and practical circuit board designed for quick familiarity and mastery of the ISD1700 series chip. It is suitable for ISD1700 whole series chip, and has the characteristics of simple operation and complete function. ISD1700 series video recording chip is a high integration, high performance chip. It can be recorded in multiple segments, and the sampling rate can be adjusted between 4K and 12K, and the power supply range can be between 2.4V and 5.5V. ISD1700 also has a new recordings function. When a new recording is available, the LED will flash every few seconds to prompt the user to have a new recording. In addition, there are 4 kinds of sound effects to prompt the user's operating results, such as starting recording, stopping recording, erasing, the next and all erasure. The recording data is stored in the FLASH of the chip, without any compression, so it has better sound quality and power off storage. The chip has two independent voice signal input channels, and the microphone input and analog signal input. In the independent key mode, the chip automatically enters the power down mode to reduce power consumption when a functional operation is completed. In the SPI mode, the user can perform more functional operations on the chip. If any storage address is recorded, the Analog PathConfiguration register (APC) is read and written.
Specification:
Size: 5.2CM x5.5CM
Power supply: 5V
Recording time: 6K, 75 seconds, 8K, 60 seconds
The working frequency of the chip is 6KHZ and 8KHZ.
With power indicator lamp, the chip indicator lamp is on.
It is easy to operate and can work directly without the
need of microcontroller or other modules.
Chip control pins have led to easy control connections
Three, ISD1700 module independent work instructions (key instructions)
1. recordings REC:
Hold down the REC key, and the LED lamp will start and talk to MIC at this time, and the content will be recorded in the ISD1700 voice chip.
After recording a paragraph to lift this key, LED will be extinguished at the same time, again pressed to start recording the second paragraph, the subsequent sections of the operation.
2. PLAY: sound
There are two ways, edge triggers and level triggers. (Note: the pointers at the end of the record will stay at the beginning address of the final recording section, and the last paragraph is released at this time).
(1) edge trigger: click the PLAY key to put the current section, and the LED flashes during the sling until the end of the sound is put out. After the end of the sound, the pitch pointer points to the starting address of the rigid section, and the PLAY key will be placed again.
(2) level trigger: always press the PLAY key chip to play all the voice information and circulate until the button is loosened.
3. fast forward FWD:
Before executing the sound operation, click the key point to point to the next section, and press two to point the beginning of the second section after this section. If you press this button during playback, stop playing the current segment and play the next paragraph. If the current play is the last paragraph, stop playing the last paragraph to play the first paragraph.
4. erasing ERASE:
The single segment erase operation is only effective for the first and the last segment. When the pointer is located in the first or last segment, pressing the key will erase the first or last segment. The corresponding pointers will jump to the second or second sections before the erasure. Press this key for more than 3 seconds, the chip goes into the "erase mode". At the same time, LED lights flash two, continue to press this key, LED flicker 7, and then extinguish. When this key is released, the voice information in the chip is erased.
5. reset RESET:
Click this key chip to perform the reset operation. After the reset, the sound and the recording pointer all point to the last paragraph, that is, the sound pointer points to the last paragraph, and the recording pointer points to the last section. At this point, the last paragraph is played by the execution of the sound, and the recording is executed, then the last paragraph begins with the last paragraph.
6. tone VOL:
Click this button to adjust the size of the output sound of the chip. The chip default output is the maximum sound, and the sound is pressed at each point, and the sound attenuates by 4dB. Keep pressing this key until the sound is minimal, and the sound increases by 4dB at each point, and the sound output is maximum after the reset.
7.FT through operation:
The FT pins are connected to the GND short, and the low level will start the straight through mode. The direct operation will direct the voice from the Analn side to the horn or AUD output. During the recording, if you press FT, the voice signal that Analn enters will be recorded at the same time
Kapcsolódó termékek
Kapcsolódó cikkek
Vélemények (küldje be Ön is véleményét)
RÓLUNK
Cégünk elektronikai és szoftveres fejlesztésekkel foglalkozik, ami mellett internetes kereskedelmet is indítottunk az ehhez kapcsolódó modulok és fejlesztő egységekkel. Már több mint 15.000 féle termék rendelhető, melyből több mint 5000 saját raktárunkról azonnal elérhető. Fiatal cégként dinamikusan bővülünk, alkalmazkodunk a modern igényekhez. Támogatjuk a hazai fejlesztéseket, és diákokat, termékekkel, szolgáltatásokkal, és saját tudásunkkal. Rendszeres vásárlóink között tudhatunk rengeteg magyar nagyvállalatot, oktatási intézményt, megbízóink között pedig több fejlődő kis- és közép- vállalkozást.
Cégünk elektronikai és szoftveres fejlesztésekkel foglalkozik, ami mellett internetes kereskedelmet is indítottunk az ehhez kapcsolódó modulok és fejlesztő egységekkel. Már több mint 15.000 féle termék rendelhető, melyből több mint 5000 saját raktárunkról azonnal elérhető. Fiatal cégként dinamikusan bővülünk, alkalmazkodunk a modern igényekhez. Támogatjuk a hazai fejlesztéseket, és diákokat, termékekkel, szolgáltatásokkal, és saját tudásunkkal. Rendszeres vásárlóink között tudhatunk rengeteg magyar nagyvállalatot, oktatási intézményt, megbízóink között pedig több fejlődő kis- és közép- vállalkozást.
KÖZÖSSÉGI JELENLÉT
2016-tól mi béreljük az elektrobot.hu-t, mely egy közösségi blog és híroldalként indult, ezen keresztül korábban több elektronikai cég forgalmazott, és jelenleg is hírdeti szolgáltatásait. Rendszeresen jelen vagyunk a magyar elektronikai fórumokon online és kiállítások, rendezvények formájában. Próbáljuk összehozni az oktatásban és versenyeken résztvevőket a fiatal cégekkel, és a komolyabb megbízókkal.
2016-tól mi béreljük az elektrobot.hu-t, mely egy közösségi blog és híroldalként indult, ezen keresztül korábban több elektronikai cég forgalmazott, és jelenleg is hírdeti szolgáltatásait. Rendszeresen jelen vagyunk a magyar elektronikai fórumokon online és kiállítások, rendezvények formájában. Próbáljuk összehozni az oktatásban és versenyeken résztvevőket a fiatal cégekkel, és a komolyabb megbízókkal.


